NOTICE: JetBackup WHMCS Module has reached End of Life (EoL) on March 1st, 2021.
WHMCS version 8 now offers native support for JetBackup backup services. For a Step-by-Step Guide, please visit Integrating JetBackup with WHMCS 8+
WHMCS version 8 now offers native support for JetBackup backup services. For a Step-by-Step Guide, please visit Integrating JetBackup with WHMCS 8+
Getting & Installing
System requirements
Minimum system requirements for the WHMCS JetBackup module -
- php versions: 5.6, 7.0, 7.1, 7.2
- php openssl extension.
- WHMCS version 7.7 and above. (version 8 not supported)
- JetBackup 4.0.0 and above.
Downloading
Please download the module at:
Once downloaded, upload the file to your WHMCS modules folder
(for example: /home/whmcsuser/public_html), and unzip the file.
Then:
- Remove the uploaded zip file.
- If you are uploading the files as root user, don’t forget to change owner & permissions *
Activating
First, purchase a JetBackup WHMCS module license from our website https://www.jetapps.com/buy-now.
Then, navigate to the JetApps client area with the following link:
Or, once logged in, click on the Services > My Services tab to find your JetBackup WHMCS module service with its corresponding license key.

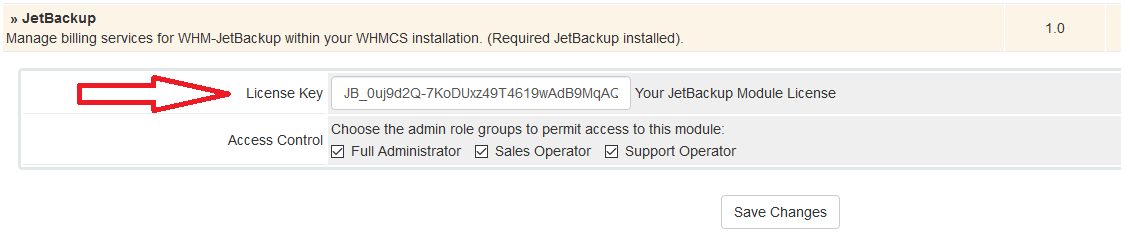
Now login to your own WHMCS billing system (where the JetBackup module is installed) as the admin user and navigate to “Setup” → “Addon Modules”.
Select “configure” next to the JetBackup module and enter your license key you retrieved from the JetApps client area.
Select “Activate” if it is not already selected for the module.
Your JetBackup module is now properly activated.