Disaster Recover BMR (Bare-Metal Restore)
The Bare-Metal Restore (BMR) feature is available in JetBackup 5 v5.3.0 +.
The Bare Metal Restore feature for JetBackup 5 allows for a backup job to be created that contains operating system, panel, panel accounts, and server files/configuration data. This information is stored in an ISO format that can be used for a server-level restore.
JetBackup's BMR Guide utilizes RHEL's Relax and Recover (ReaR) to perform a complete system restore. Please take note of the restrictions and limitations below.
ReaR Known Limitations:
- ReaR supports recovery to new hardware, however the hardware of the original server may not be compatible with the hardware in the new server. Please check and confirm hardware compatibilty before performing the restore.
- Recovery to new hardware may also require manual adjustments to:
- modify disklayout.conf (adjust amount of disks, controllers, and any other custom configs)
- edit partion/LV sizes in the case of restoring to a smaller storage.
- configure network interfaces
Note: Only destinations that utlizes our JetIndex Engine can be used when creating a Server Backup (BMR) backup job.
The JetBackup 5 Disaster Recovery BMR Process is split into 2 Separate Backup Jobs:
- A Disaster Recovery Backup Job that backs up data required for the server-level restore (OS, disks, Panel, Server files, and configuration) and generates a bootable ISO to execute the server-level restoration.
- A Standard Full Account Backup Job that stores all data at the account level which is then restored after the server-level restore is complete.
Here are the steps to take when performing a Disaster Recovery BMR:
- Create a Disaster Recovery Backup Job and Full Account Backup Job
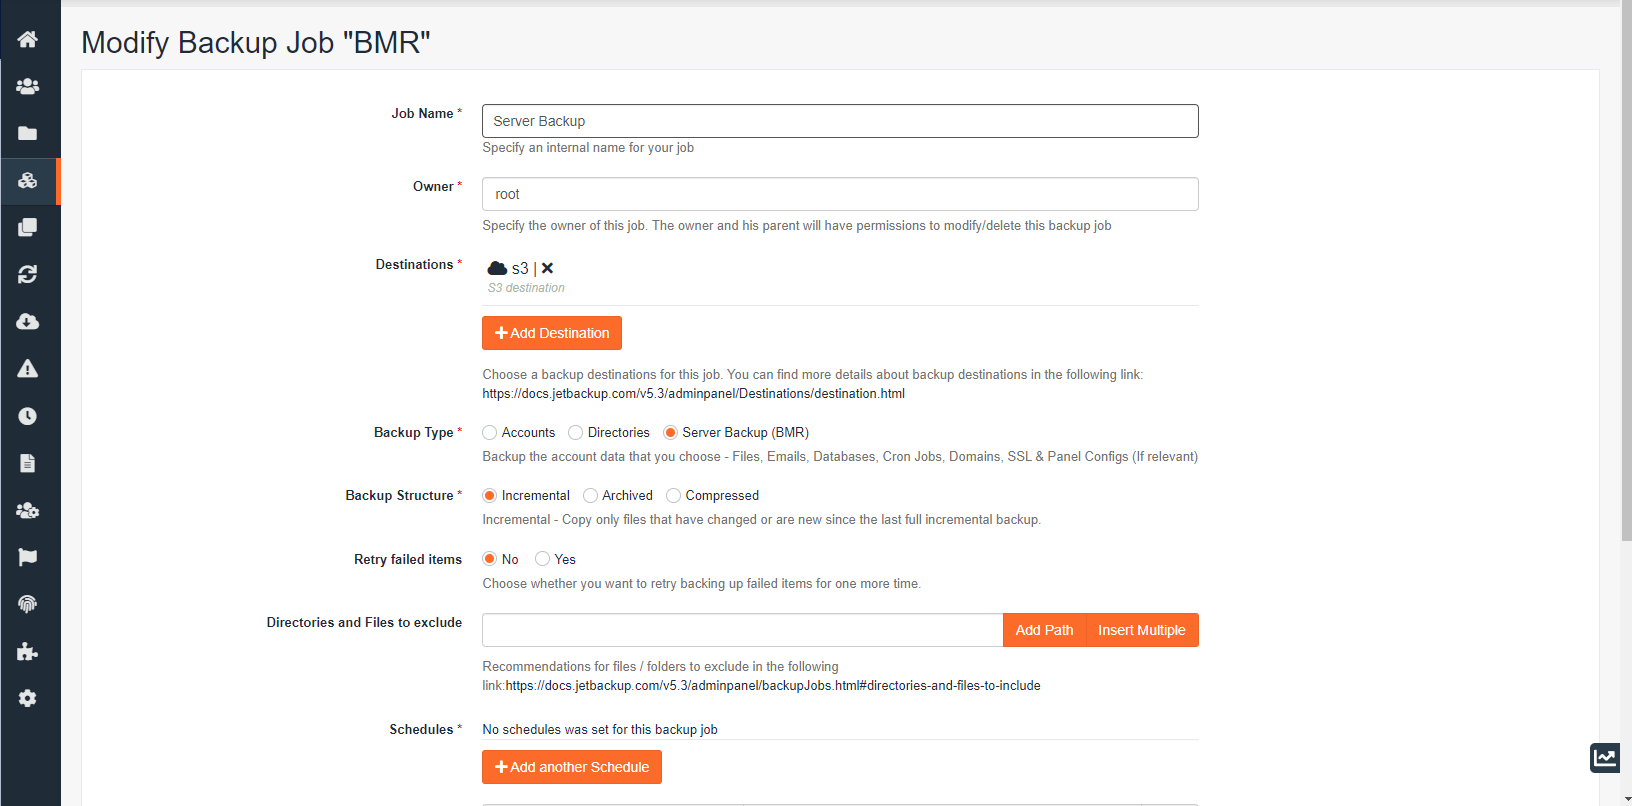
We suggest adding these recommended files and folders to exclude.
By default, the following files/directories are excluded from the BMR backup job:
/proc
/sys
/home/virtfs/*
/home/{linux_users}
/usr/share/cagefs-skeleton/*
JetBackup 5 Workspace directory
JetBackup 5 /lib/mongod/* directory
JetBackup 5 tmp folder
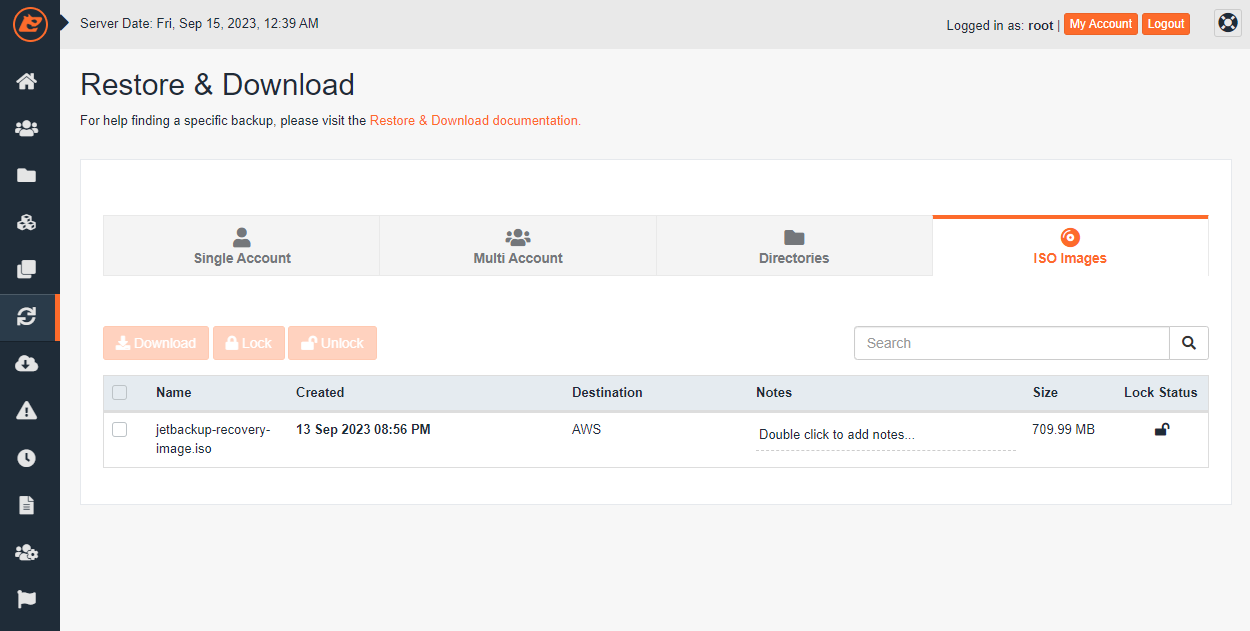
- Download the Bootable Recovery ISO
- You can download the ISO from the Restore & Download page in JetBackup 5
- Or directly via your configured Backup Destination
/PATH/TO/DESTINATION/jetbackup_4_1_{DR_BACKUP_JOB_ID}}/snap.1
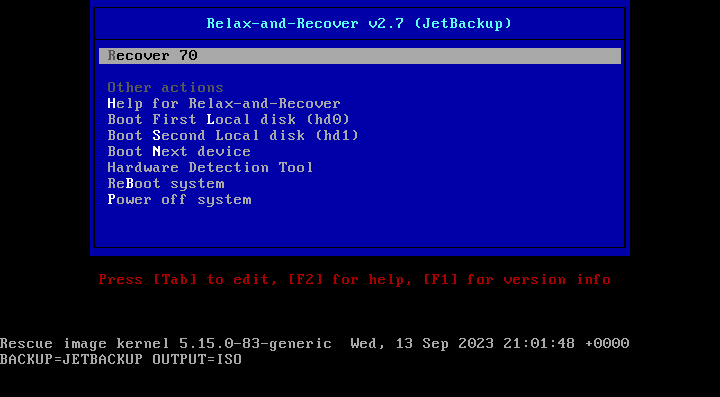
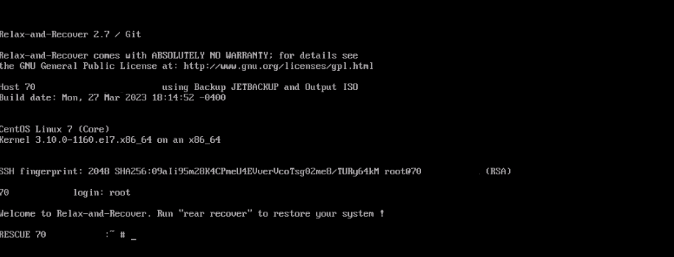
- Boot up the ISO and run the recovery
Initial Boot Configuration
On initial boot, the new server will still have the original IPs that were set on the source server.
To prevent any conflicts, update your IP and network configuration. You are able to update the IPs by editing your server's network configuration with the following command:
ifconfig <interface_name> <ip_address> netmask <netmask_address>
You can verify your changes by executing ifconfig
Execute chroot /mnt/local and make any neccesary IP changes to /etc/sysconfig/network-scripts.
Once you have completed all of the IP/network configurations run rear recover in the CLI. This will automatically configure the recovery process to fetch server level data, operating system, disks, server and Panel files and configurations, etc. When finished, reboot the server.
We recommend running a system update and additional post-BMR checks/updates depending on your server environment (OS/Panel).
You have now completed the server-level restore. When JetBackup 5 is launched, it will begin the Disaster Recovery process to restore accounts and JetBackup configurations.