S3 Compatible
S3 Compatible (Simple Storage Service) is a scalable, web-based cloud object storage service that is used for remote backups and archiving of data and applications. You also have the option to configure a custom S3 compatible storage provider which utilizes the S3 API.
To connect S3 Compatible to JetBackup:
Step 1: First make sure you have an account for a S3-compatible provider.
Step 2: Open JetBackup for WordPress on your WordPress Admin Dashboard and navigate to destinations
Step 3: Click “Create new destination” and select S3 in the dropdown menu
Step 4: You will be asked to specify your S3 Credentials:
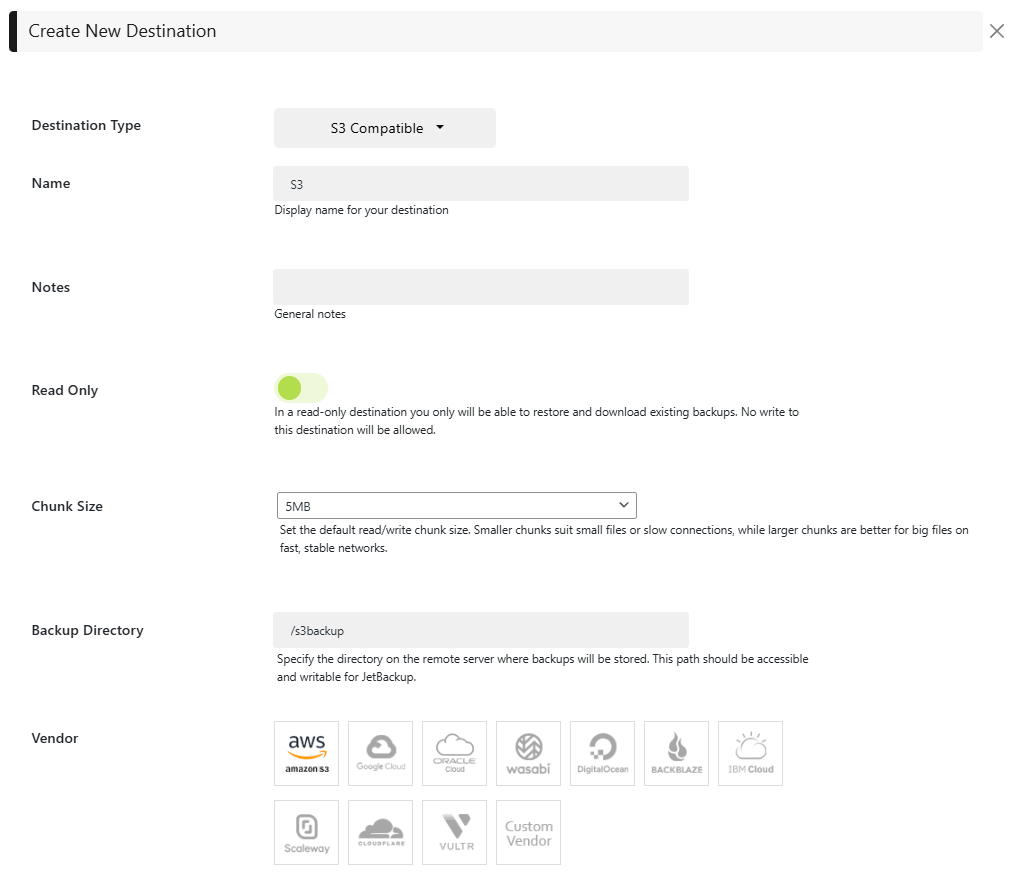
- Name: Specify the name of your destination
- Backup Directory: Specify the directory on the remote server where backups will be stored.
- Vendor: Choose which S3 compatible vendor you will be using as your S3 destination.
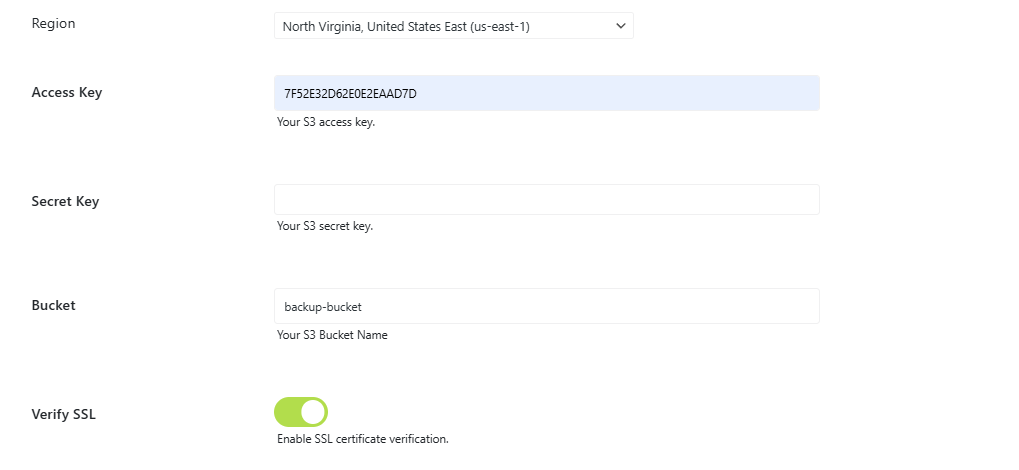
- Region/URL: JetBackup will list known regions for the S3 Destination chosen. For a Custom Vendor, the region can be entered manually if required by the vendor.
- Access Key: Every S3 Destination has a Access/Secret Key Pair you must use in order to authenticate and store data to your S3 destination.
- Secret Access Key: Your S3 secret key.
- Bucket: A Bucket is the term used for Amazon S3 and S3-compatible cloud destinations cloud storage which stores your data as objects.
- Verify SSL: Enable SSL certificate verification.
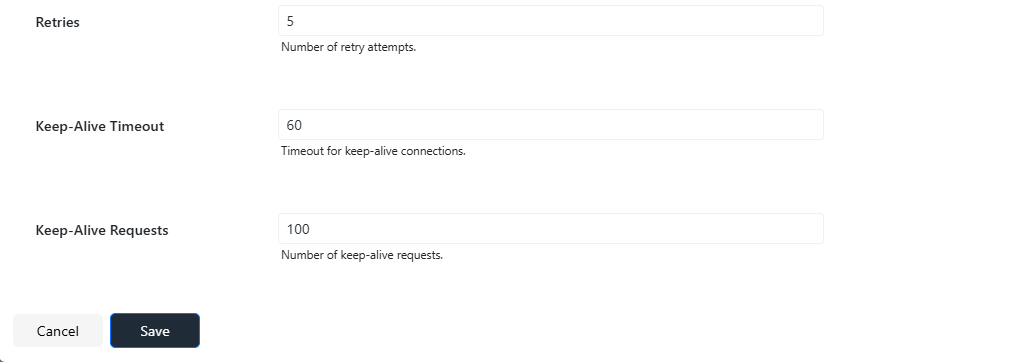
- Retries: Number of retry attempts
- Keep-Alive Timeout: Timeout for keep-alive connections.
- Keep-Alive Requests: Number of keep-alive requests.
Step 5: Once you have all the requested fields filled, click the “Save” button and JetBackup will establish a connection to your AWS S3/S3-compatible server.
Your S3-compatible server is now connected to JetBackup!
Access/Secret Key Pair
Below is a non-exhaustive list of available S3 providers associated documentation on creating these pairs for each S3 Destination.
-
Amazon S3 - Managing Access keys AWS Console
-
Digital Ocean Object Storage - Creating an Access Key
-
Google Cloud Storage - Creating an HMAC Key
-
IBM Cloud Object Storage - Service credentials
- NOTE: Ensure to enable Include HMAC Credential to receive the key pair properly.
-
Oracle Cloud Object Storage - Create a Customer Secret Key
-
ScaleWay Elements - How to Generate an API Key
-
Wasabi - Creating a Wasabi API Access Key Set
Feedback
Was this page helpful?
Glad to hear it! Please tell us how we can improve.
Sorry to hear that. Please tell us how we can improve.