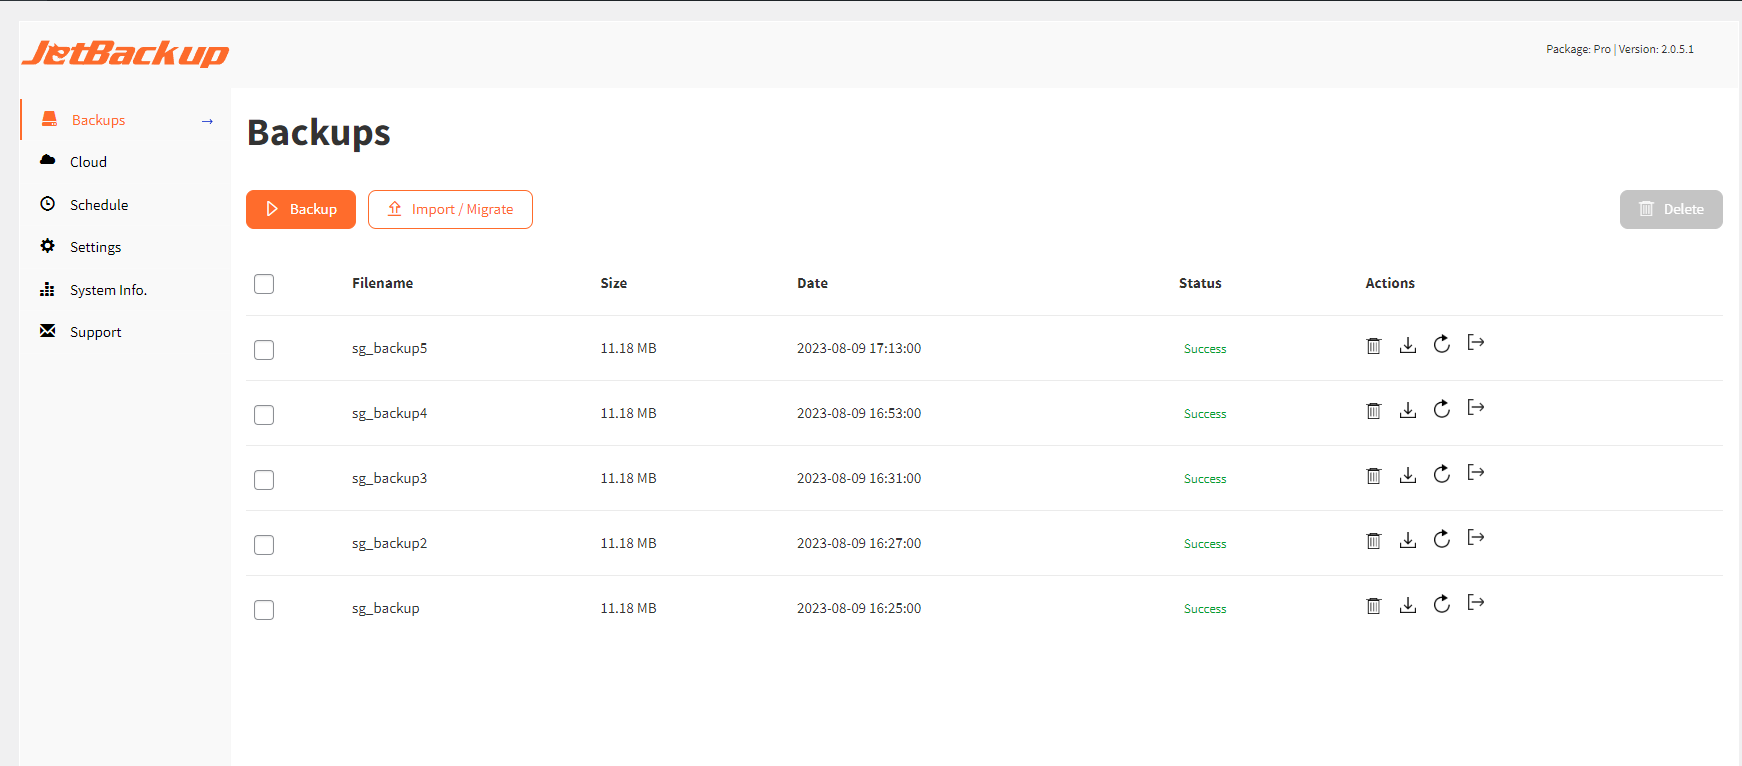
Backups
Under this section, you will have the option to manually generate and import/migrate backup files in tar compressed format (.tar or .tar.gz). You will also see a list of available backups for you to restore and download from.
Backup
List all Backups generated and uploaded:
Restore
Restore backups that were generated/imported on JetBackup for WordPress.
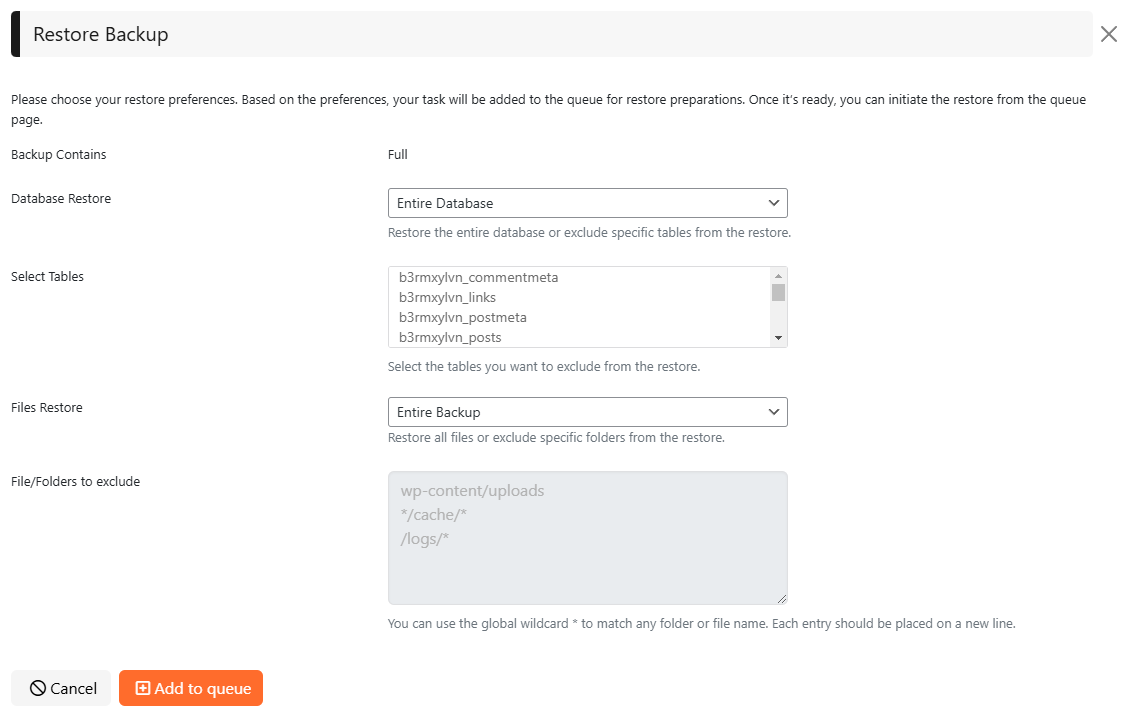
Backup Contains
Indicates the contents included in the backup.

Database Restore
Allows users to choose customize the database restoration.

Select Tables
Select the tables from the database to be included/excluded from the restore.

Files Restore
Select the file restore option.

File/Folders to exclude
Specify file or folder paths to exclude from the restore. Use the global wildcard (*) to match any folder or file name. Enter each entry on a new line.

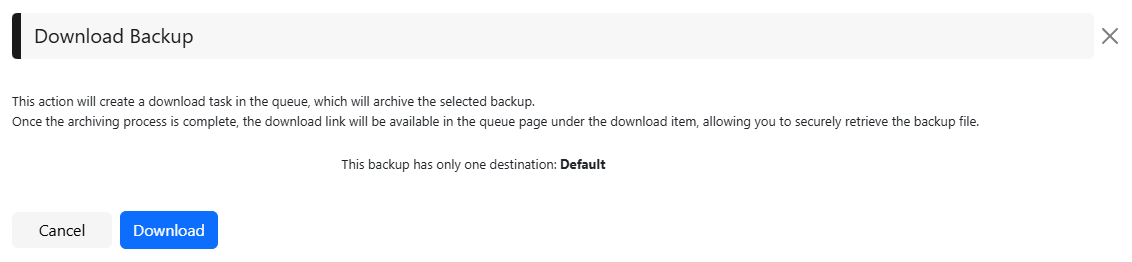
Download
This option creates a download task in the queue, archiving the selected backup. Once the download is complete, a secure download link will be available on the queue page under the download item, allow you to retrieve the backup file.
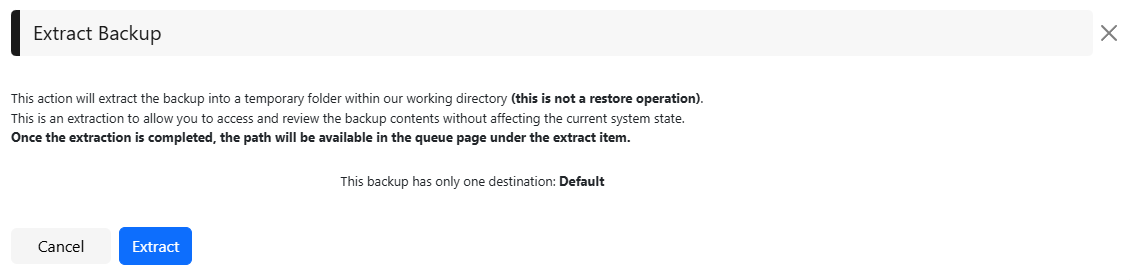
Extract
The Extract feature will extract the contents of the backup into a temporary folder within JetBackup’s working directory. The extraction allows users to examine the backup contents without affecting the current system state. The extracted backup will be available to view in the Queue Page after it finishes
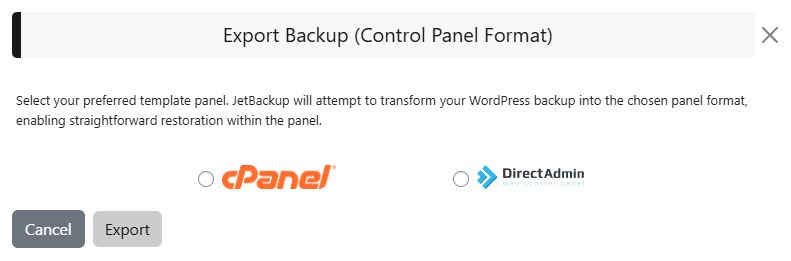
Export
JetBackup for WordPress can export backups to your preferred template panel. This option will convert the WordPress backup into the selected panel format.
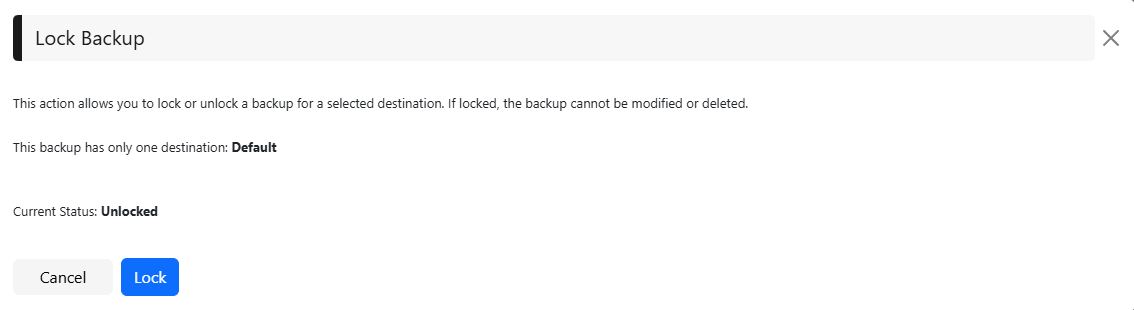
Lock
Lock the selected backup from being modified or deleted.
Delete
This feature allows users to mark or unmark a backup for deletion at a selected destination. Please note that marking the backup for deletion doesn’t immediately delete the backup, but will flag for future removal.

Edit Notes
Add notes to the backups.
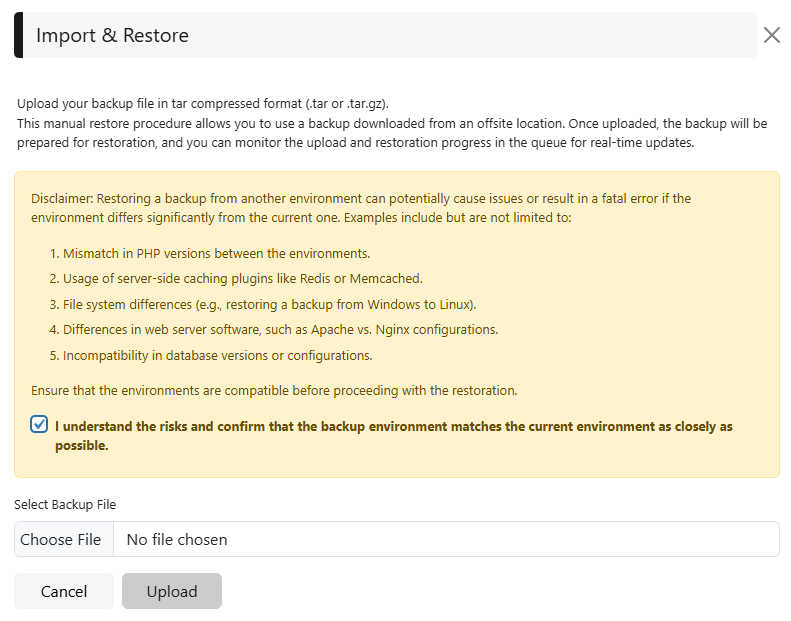
Import & Restore
Import backup files that are in tar compressed format (.tar or .tar.gz). This feature enables users to upload backups from an offsite location for restoration. Please review the disclaimer for any potential errors during the restoration process.
Feedback
Was this page helpful?
Glad to hear it! Please tell us how we can improve.
Sorry to hear that. Please tell us how we can improve.