FAQ & Troubleshooting
Frequently Asked Questions (FAQ)
How to Link a Website to JetBackup for WordPress
In order to link your website to your JetBackup for WordPress plugin, first you need to install the plugin on your WordPress site. Once complete, you will then be asked to link your website to your associated JetBackup for WordPress license when first accessing the plugin on WordPress.
How to Unlink a Website from JetBackup for WordPress
To unlink your WordPress site from an existing JetBackup for WordPress license, please log in to the JetApps Client Area, navigate to “Services” > “My Services” (JetApps Services Page), click on your corresponding “JetBackup for WordPress” license, and then click on the X icon corresponding to the domain you would like to unlink/remove from your license.
How to Download the JetBackup for WordPress Plugin
To download your JetBackup for WordPress plugin, log in to the JetApps Client Area, navigate to “Services” > “My Services” (JetApps Services Page), click on your corresponding “JetBackup for WordPress” license, and then click download.
How to Upgrade/Downgrade Your JetBackup for WordPress License
To upgrade or downgrade your current JetBackup for WordPress license, please log in to the JetApps Client Area, navigate to “Services” > “My Services” (JetApps Services Page), click on your corresponding “JetBackup for WordPress” license. Under the “Actions” menu, you should see the “Upgrade/Downgrade Options” which will redirect you to select the available options for upgrading or downgrading your license.
Upgrade Billing - You will be automatically charged the difference between your current license tier and the tier you are upgrading to.
Downgrade Billing - You will be given a credit to your JetApps account for the difference between your current license tier and the tier you are downgrading to.
My License Was Suspended! What Do I Do?
If you see the “JetBackup Error: License Expired” message and have already paid your due invoice, the message will be cleared on the next automatic license check. This message will only display if the license was not active when contacting the licensing server. If you’re not sure how to pay your invoice, please contact us.
Why Can’t I Give My Backups a Custom Name?
The option to create a custom backup name was removed to enhance the overall security of backups. In addition to this change, a randomized hash is appended to the backup folder and file names to further secure the backups.
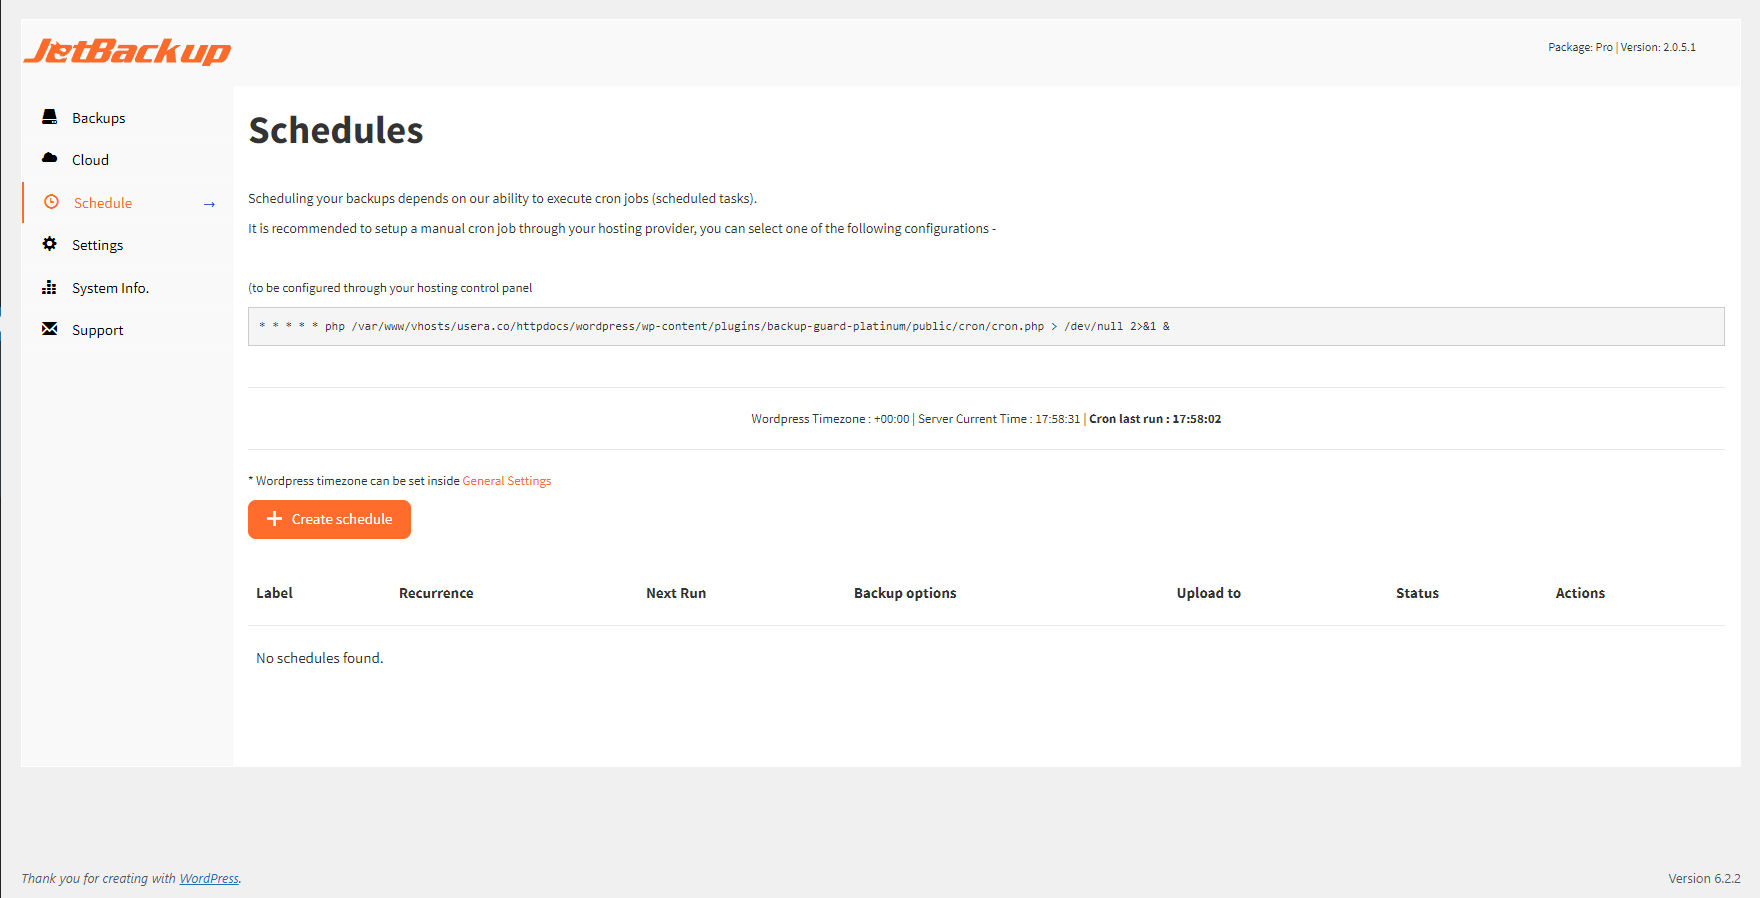
How to Schedule a Hit to the JBWP Cron for Scheduled Backups to Run
Server Crontab Method (Hosting provider needs to provide you shell access):
- Open your terminal and access the crontab editor by executing the command:
crontab -u {username} -e, replacing{username}with your appropriate username.
[root@jbwp]# crontab -u {USER} -e
- Copy the server-level cron command found on JBWP > Schedule. The command may look like this:
* * * * * php /home/user/public_html/wp-content/plugins/backup-guard-platinum/public/cron/cron.php > /dev/null 2>&1 &
- Paste the copied cron command into the crontab editor.
- Save the changes and exit the editor. The PHP script will now execute as a cron job, running every minute in the background.
Web Cron Method (One-minute interval monitoring tool is required):
- Locate the ‘Web’ Cron URL on the Schedules page. The ‘Web’ Cron URL may look like this:
https://test.com/wp-content/plugins/backup-guard-platinum/public/cron/cron.php?token=e50a7b9e9cf3c92a0288e7b3db629c30
-
Create a Schedule and adjust the settings according to your preferences.
-
Utilize an online service that offers one-minute interval monitoring and pings your website. Example tools can be found below.
-
Configure the monitoring tool to trigger the cron job via the web by “pinging” the cron URL found in Step 1. The monitoring tool will ping the domain every minute, activating the backups as scheduled.
Feedback
Was this page helpful?
Glad to hear it! Please tell us how we can improve.
Sorry to hear that. Please tell us how we can improve.