Please CLICK HERE for the latest JetBackup 5 for Linux Documentation.
Rsync.net
Step 1 Create a Rsync account
- Create an account at http://rsync.net using one of the pricing plans from http://rsync.net/pricing.html.
- After filling up your details at https://www.rsync.net/signup/order.html wait for your account to be created and for rsync welcome email titled "Your rsync.net filesystem is ready".
Step 2 Generate SSH keys
Login to your Server using SSH:
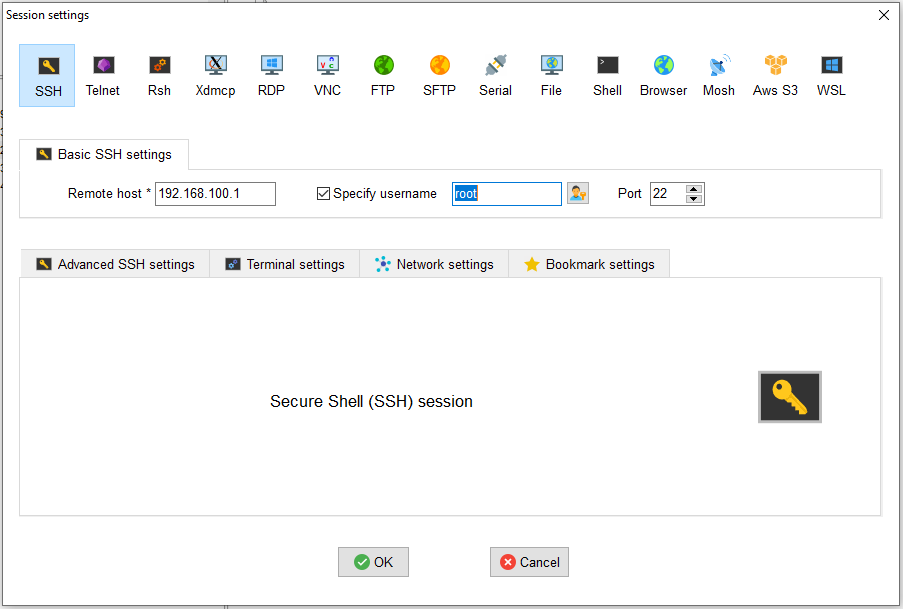
In your SSH console generate the SSH Keypair by running:
ssh-keygen -t rsa -f ~/.ssh/rsyncnet_rsa
JBRSYNCHOST=USER_ID@HOST_ADDRESS;
JBKEY=`cat ~/.ssh/rsyncnet_rsa.pub`; JBPK='/usr/local/jetapps/tmp/rsync-net-pk' && scp $JBRSYNCHOST:.ssh/authorized_keys $JBPK && grep "$JBKEY" $JBPK &>/dev/null || echo "$JBKEY" >> $JBPK && scp $JBPK $JBRSYNCHOST:.ssh/authorized_keys; rm -f $JBPK
ssh -i ~/.ssh/rsyncnet_rsa $JBRSYNCHOST ls
Step 3 Create a backup destination
- Specify "Type" as "Rsync.net".
- Write a name for your destination.
- Write your remote hostname and account username as mailed to you from rsync.net.
- Write you private key:
~/.ssh/rsyncnet_rsa - Click the "save" button.
An example configuration page for the destination:
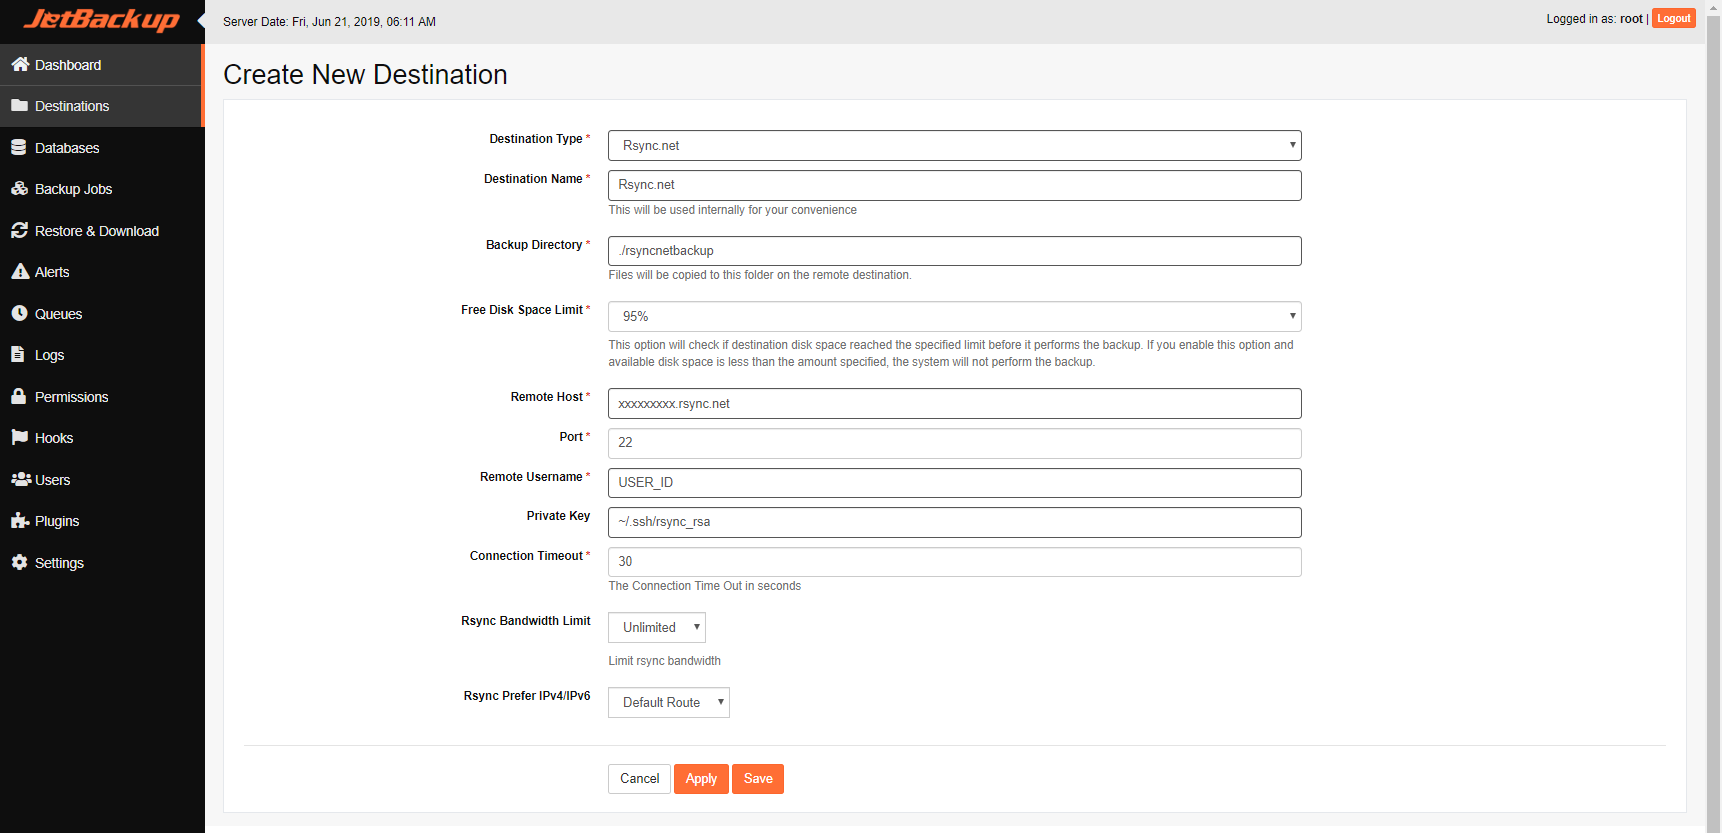
Destination Name
A generic name for your internal ease of use, so it will be easier to recognize the backup destination roll, in case you have more than one.
Max length is 40 characters.
Backup Directory
This will be our starting point when accessing this destination.
There are two ways to get to each directory: Relative, Absolute
Let say your home dir is '/home'
Relative path ./ will point to the absolute path /home/USERNAME
- on the same principle FOLDER will be the remote user's home dir subdirectory /home/USERNAME/FOLDER.
Make sure that you always have the right permission to the path you're using.
Free Disk Space Limit
This option will check if destination disk space reached the specified limit before it performs the backup. If you enable this option and available disk space is less than the amount specified, the system will not perform the backup.
Remote Host
The remote host to log in with. Your host address as mailed to you from rsync.net.
Port
Your remote port. Default port is 22.
Remote Username
The remote user to login with. Your username as mailed to you from rsync.net.
Private Key
Since we are using rsync for backups, we will need to set up access keys between the servers, so we can log in to the remote server without prompting for a password. If empty, it will be automatically created by JetBackup. To find a guide for that, search for ssh without password.
Connection Timeout
Timeout for the connection. The default value is 30 (The connection time out in seconds), you can increase this if the connection to the remote server is poor and you might face longer timeout issues.
Rsync Bandwidth Limit
Limit rsync bandwidth.
Rsync Prefer IPv4/IPv6
Choose your preferred IP version.