NOTICE: This Documentation is for JetBackup 4 for Linux.
Please CLICK HERE for the latest JetBackup 5 for Linux Documentation.
Please CLICK HERE for the latest JetBackup 5 for Linux Documentation.
Restore From Disaster Recovery
JetBackup has the ability to restore from a disaster by storing our JetBackup internal database to your preferred destination.
Important information!
- JetBackup will backup it's internal DB only when "Export JB config Mode" is enabled on your backup destination. In order to do so, click on "Export JB Config" on your preferred Destination. Keep your DR destination details to be able to restore from DR. The JB config backup will be executed every night and will keep a max of 7 newest snapshots.
- Please make sure to keep your key safe -> How To Get My Master Private Key?
With an entire data loss, your first step will be to install JetBackup on any Linux server that meets our requirements(see Installation).
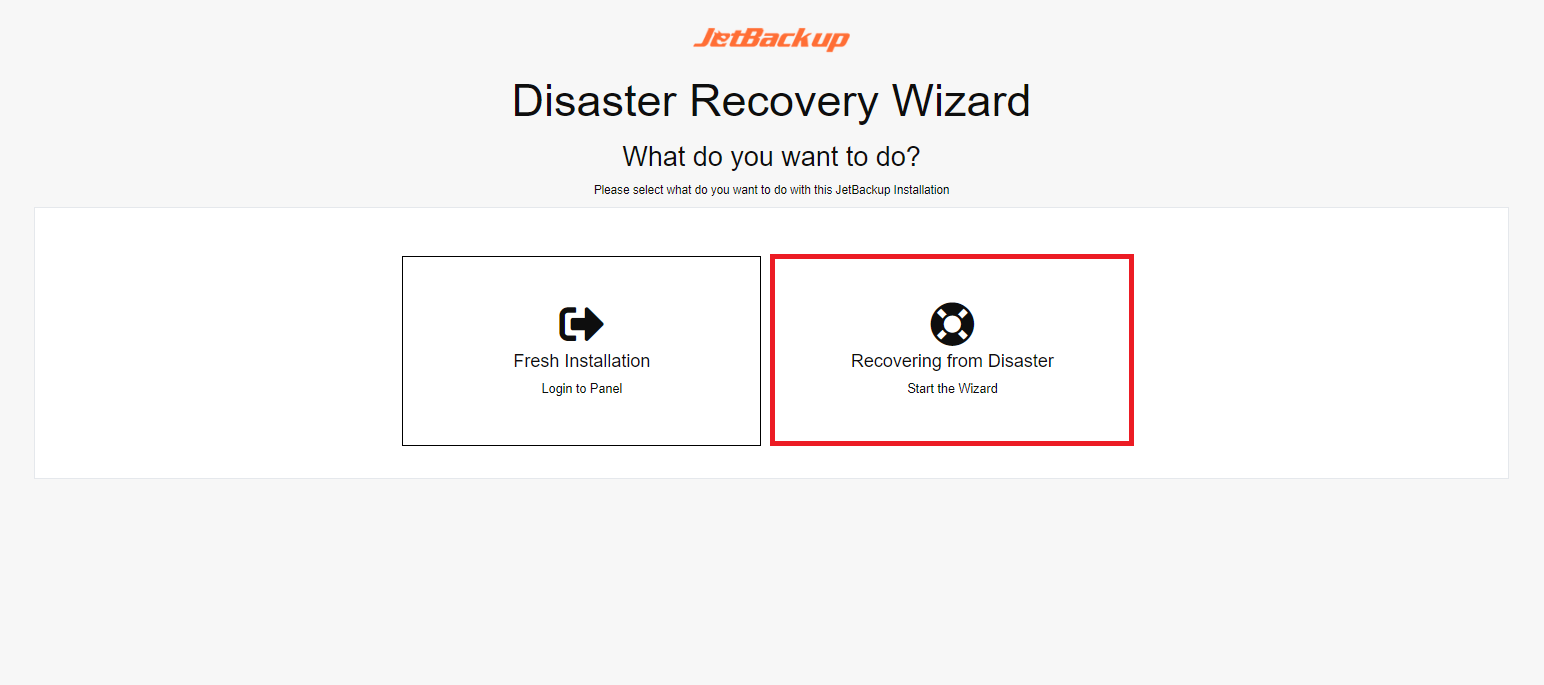
Once installed, on the very first initial screen you will be asked if you want to restore from a Disaster, or it's simply a fresh install.
Choose "Recovering from Disaster" to continue disaster recovery, or "Fresh install" to abort (NOTE: you won't be able to go back to that screen anymore).
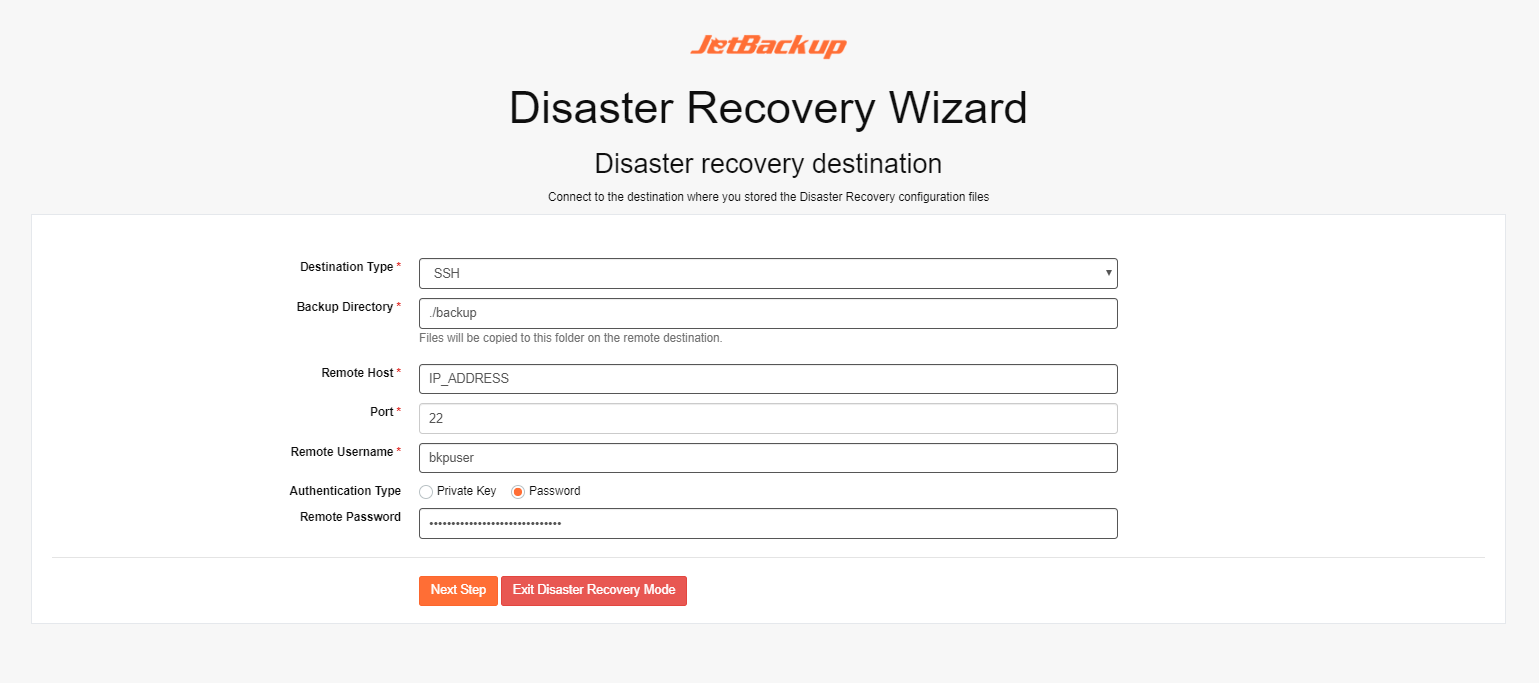
First, we will need to restore our JetBackup internal database.
Please provide us with your backup destination details so we can pull that info -
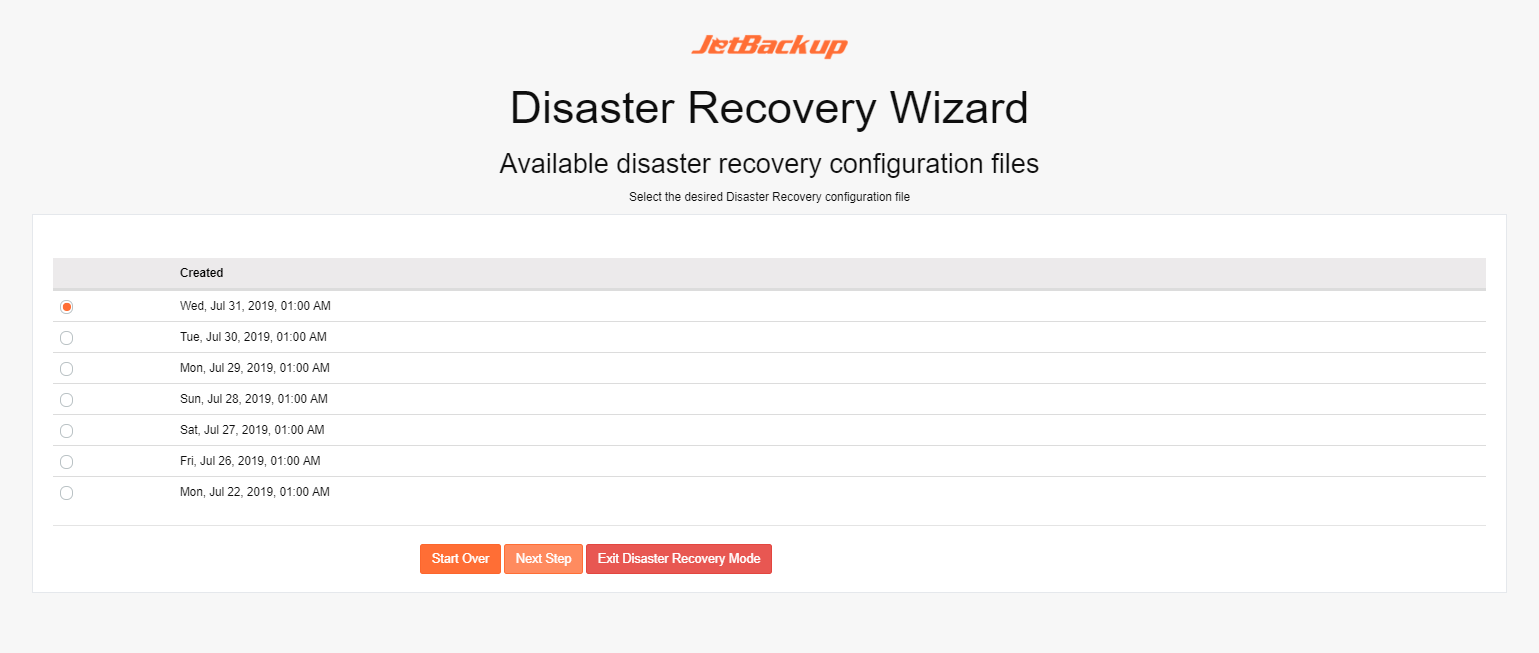
Choose the database backup (JetBackup setting) that you want to restore from (usually you will want the latest backup that was created).
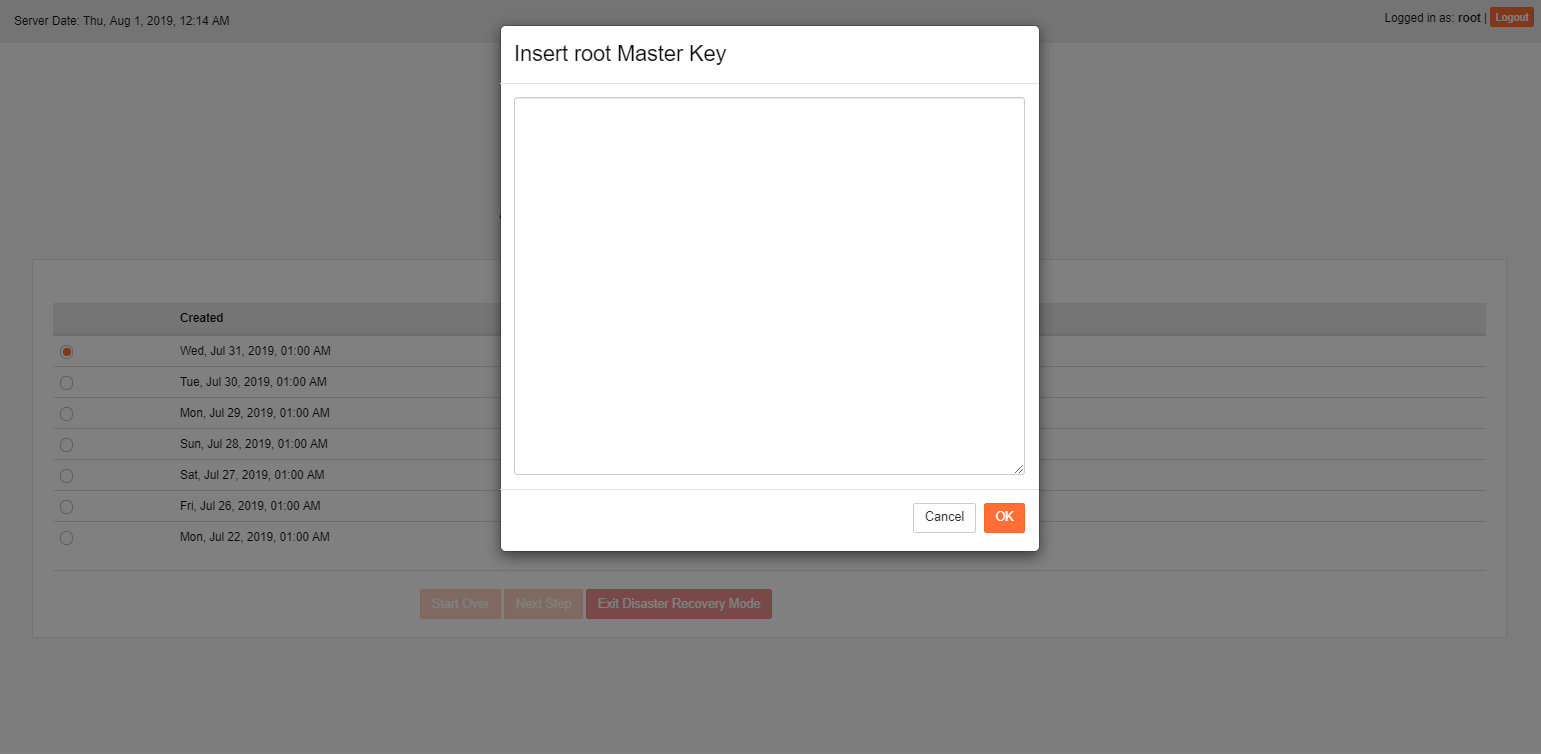
As our database is encrypted, we will need the root master private key from your previous installation/old server.
For more information about the master private key click on the following link: How To Get My Master Private Key?
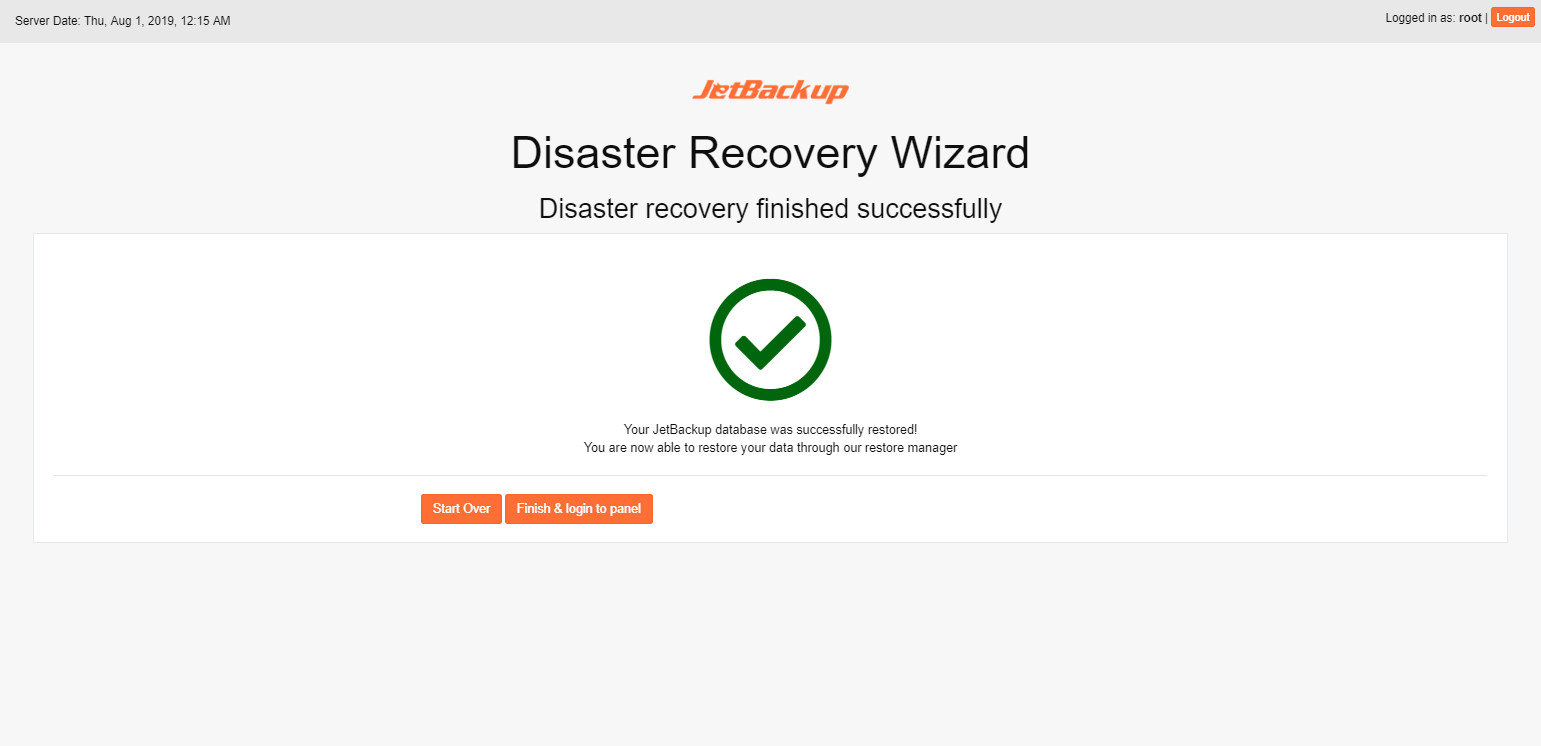
At this point, your JetBackup database has been restored and you can click the 'Finish & Login to panel' button to continue to restore your data through the Restore Manager.