Google Drive
Google Drive is a file storage and synchronization service developed by Google. It allows users to store files on their servers, synchronize files across devices, and share files. JetBackup uses the Google Drive API to transfer backups to your Google Drive cloud storage.
Using the same Google Drive Instance across multiple JetBackup servers can cause the destination to exceed the user rate limit on your Google API Quota. We recommend creating and configuring one google drive account per each JetBackup server.
Google Drive has deprecated OAuth out-of-band flow as of Feb 28, 2022 and now requires Web Applications to have a redirect URI. With this change, we have released a patch and updated instructions to support this new authentication method. Please CLICK HERE for more information.
G-Suite Shared Drives are currently not supported for the Google Drive Destination.
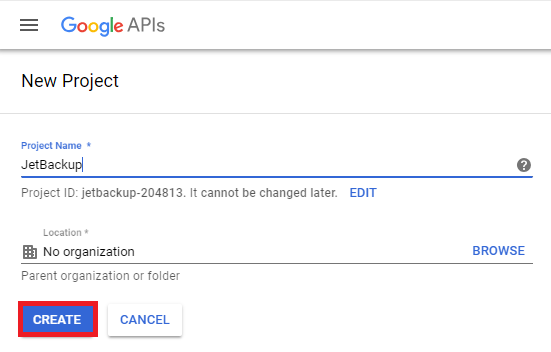
Step 1 - Configure Google Drive API

Type in your project name and click the “CREATE” button.
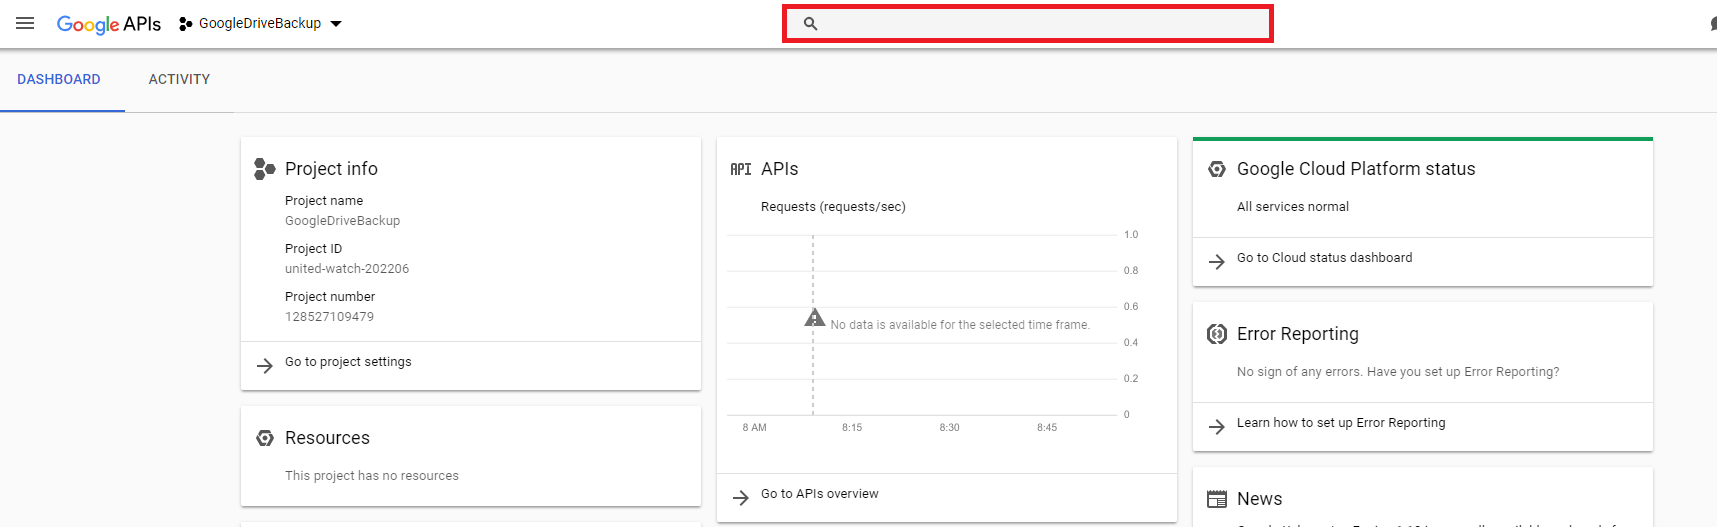
After creating the project, use the search box to search for "Google Drive API".
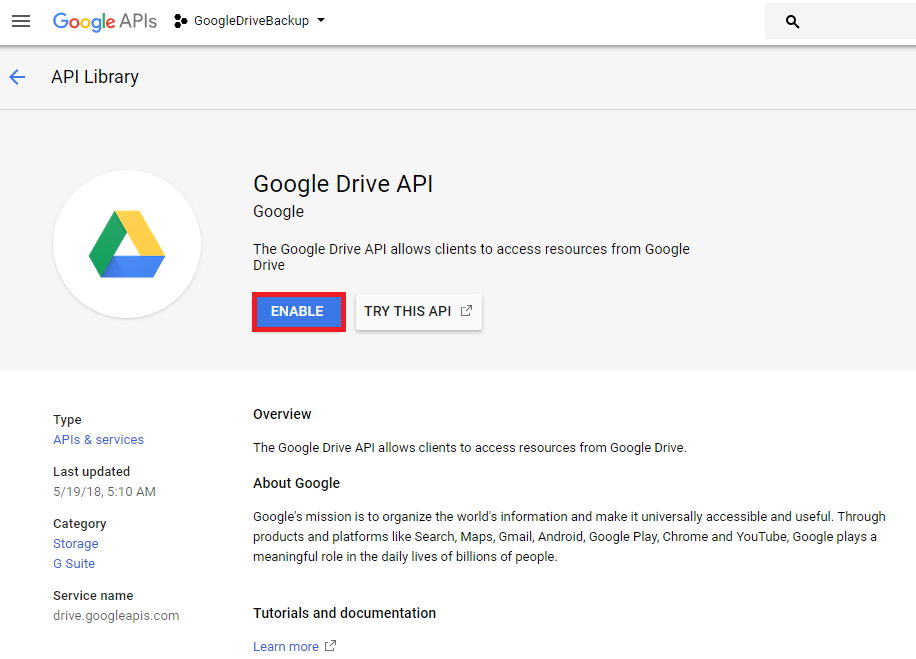
Click "Google Drive API" and the following page will appear, Click "ENABLE"
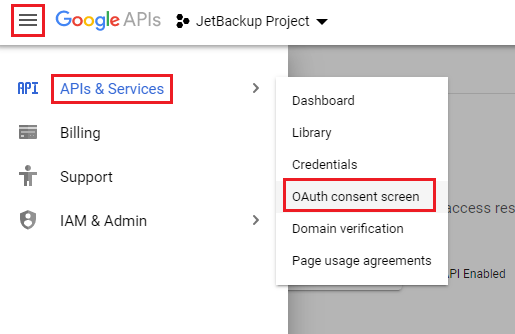
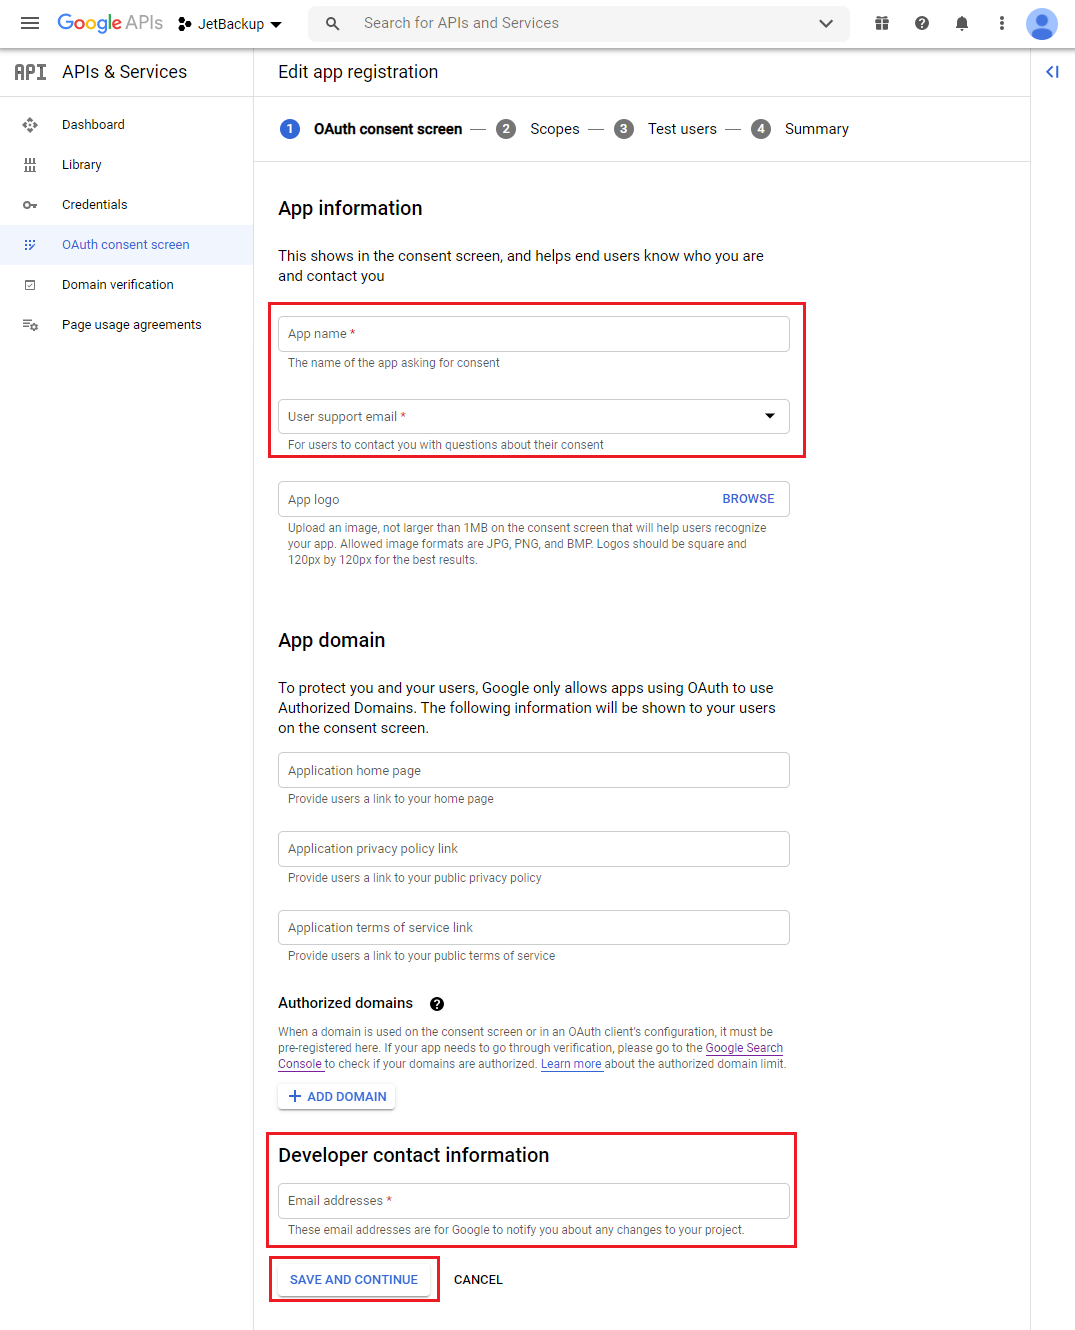
After enabling, click the drawer icon left to Google APIs logo -> APIs & services -> OAuth Consent Screen. The consent screen must be configured prior to creating an OAuth Client ID for JetBackup.
Click "Save and Continue" on the bottom to go to the next step.
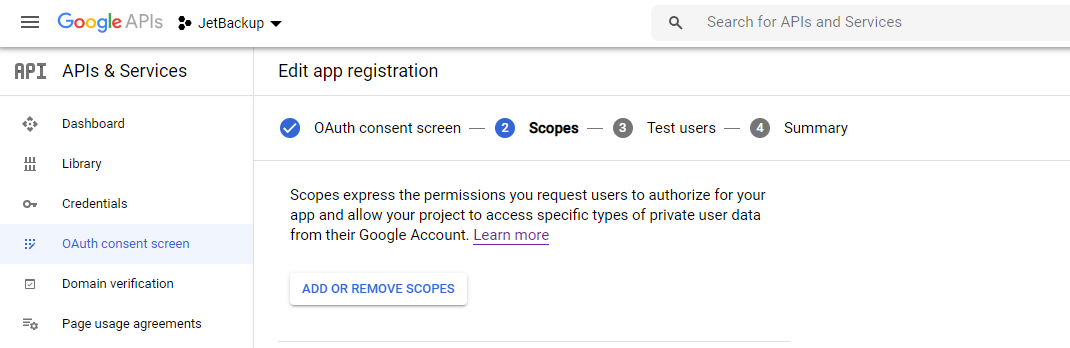
Now, you will need to configure the "Scopes" for your Project. Scopes control what access your "App" has to your Google Drive. JetBackup will require read and write ability to be able to back up to your Google Drive.
Click the "Add or Remove Scopes" button.
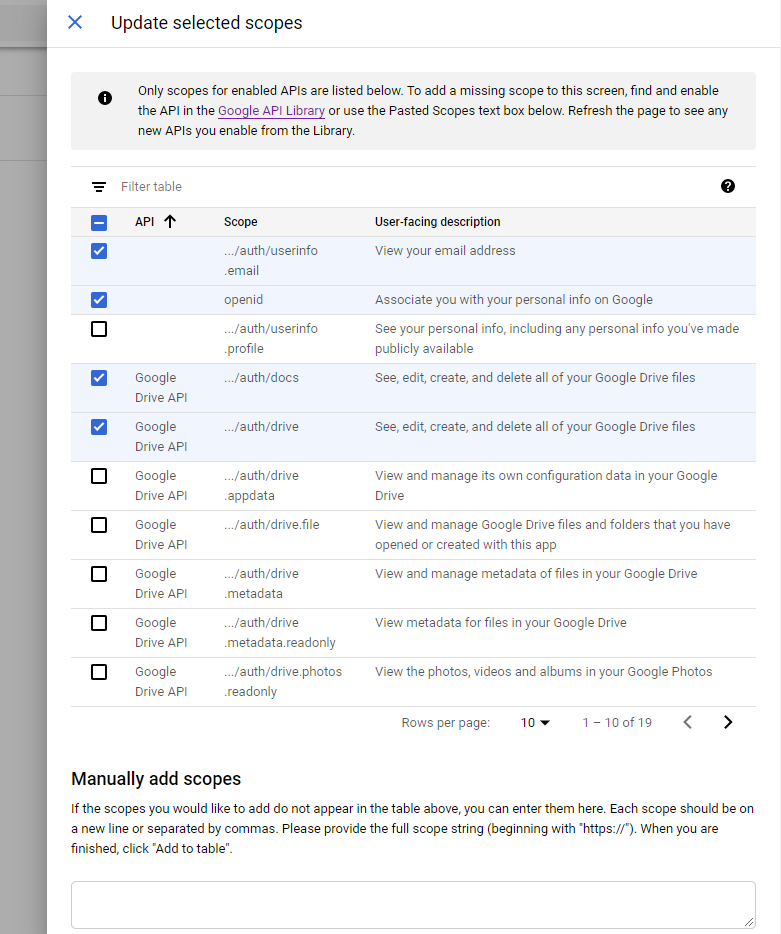
- ../auth/userinfo.email - View your email address
- openid - Associate you with your personal info on Google
- ../auth/docs - See, edit, create, and delete all of your Google Drive files
- ../auth/drive - See, edit, create, and delete all of your Google Drive files
You can read more about Scopes here: https://developers.google.com/identity/protocols/oauth2/scopes
Click "Save and Continue".
NOTE: The next step will ask you to add Test Users. You will need to add your email address as a "Test User" to authenticate with Google Drive if you do not move the "Project" out of "Testing" status in the Google Developer Console. You can skip adding a "Test User" by clicking "Publish App" from the Dashboard when complete.
Next, click "Credentials", click the "Create Credentials" button and select "OAuth client ID" in the dropdown.
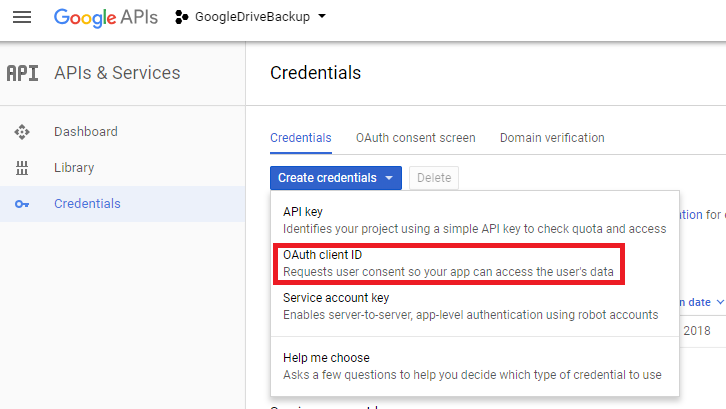
Choose "Web Application" under the Application type dropdown menu. Under Authorized redirect URIs, click on "+ ADD URI", specify https://auth.jetbackup.com/google/ on the URI field* then click the "CREATE" button.
* With Google Drive deprecating OAuth out-of-band flow as of Feb 28, 2022, Google Drive now requires Web Applications to have a redirect URI. Please make sure you APPLIED the following PATCH on your JetBackup 4 Installation in order to support this new authentication method.
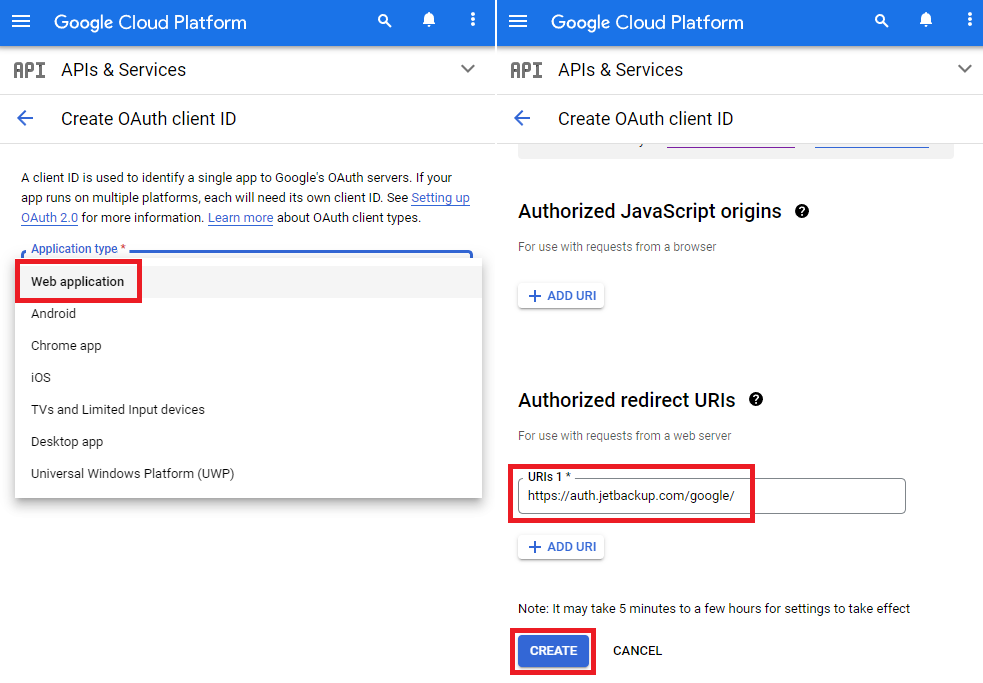
At the OAuth client window, click "OK".
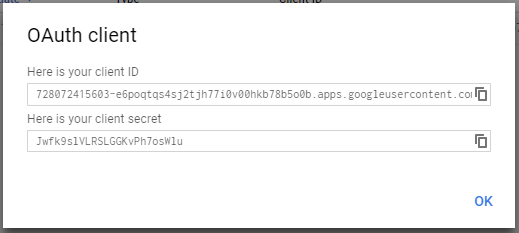
Click the download icon at the edge of the OAuth 2 client ID. This will download a JSON file which you will use later.

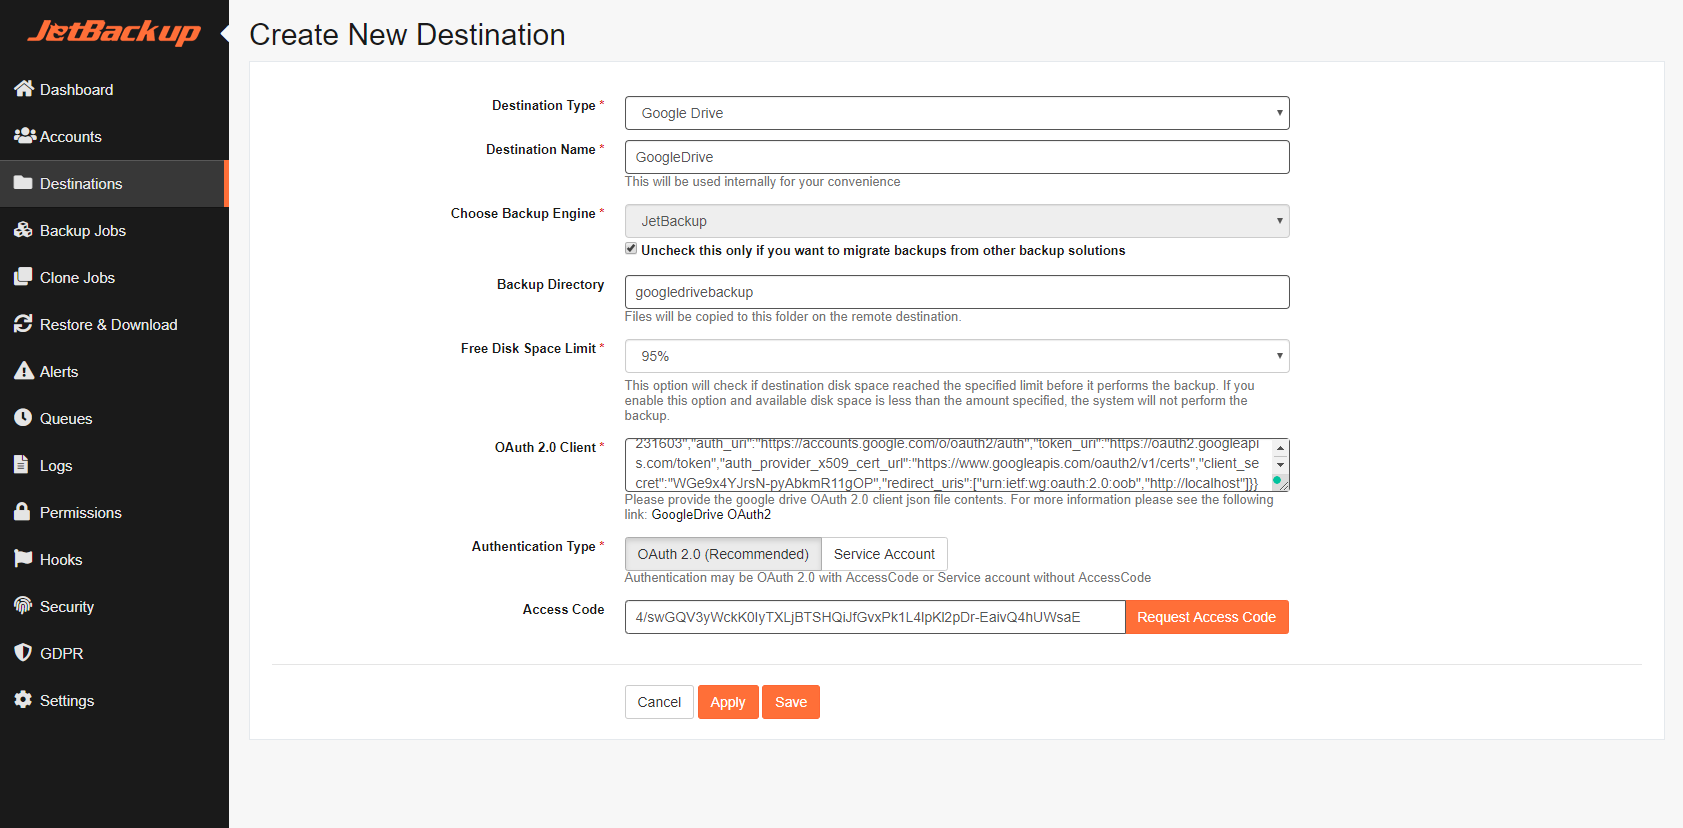
Step 2 Create a backup destination
- Specify "Destination Type" as "Google Drive".
- Write a name for your destination.
- Open the JSON file you previously downloaded with Notepad, copy the content and paste it in "OAuth 2.0 Client" text box.
- Click the "Request Access Code" button, for a Google approval window to appear.
IMPORTANT If you are not redirected to auth.jetbackup.com for the access code OR receive a "Unable to find client id in the private key you provided" error on the Create Destination page, try refreshing the page with Cntrl+F5 to clear the browser cache.
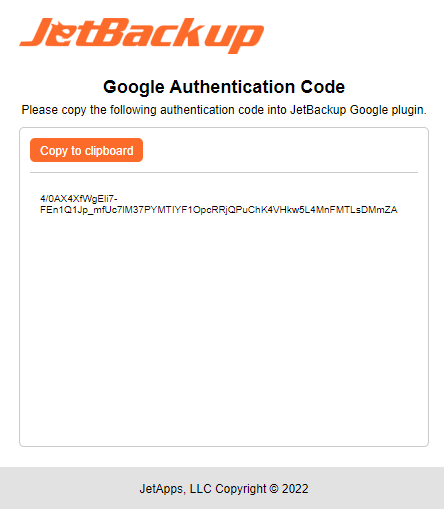
- Copy the access code and paste it to the "Access Code" text area.
- Click the "save" button.
Destination Name
A generic name for your internal ease of use, so it will be easier to recognize the backup destination roll, in case you have more than one. Max length is 40 characters.
Choose Backup Engine
JetBackup will need to index and read files from this destination. Since each backup
engine has it's own file structure, JetBackup will need to know what to look for
in the destination when indexing the backups.
Selecting cPanel as the Backup Engine allows JetBackup to index cPanel generated backups
on the destination which allows you and your clients access and restore from these backups
through the JetBackup interface. For full incremental backups generated with the cPanel Engine,
JetBackup intelligently indexes these backups to its appropriate parts(Databases, Emails etc.)
allowing you and your clients to restore full and individual parts of the backup.
With this option selected, you can schedule when to reindex the destination for backups.
It is recommended to schedule it after the cPanel backup is done to ensure the most accurate data.
Please note that this does not let JetBackup generate backups using the cPanel Engine.
Backup Directory
This will be our starting point when accessing this destination.
Make sure to not start with "/".
Write your path to where you want the backup to be stored.
You can leave the backup directory empty if you want that the backup will be stored in the main directory.
Free Disk Space Limit
This option checks if the destination's disk space has reached the specified limit before it executes the backup. When enabled, JetBackup will not perform the backup when the used disk space is over the specified limit.
OAuth 2.0 Client
Provide the google drive OAuth 2.0 client json file contents.
Authentication Type
Authentication may be OAuth 2.0 with AccessCode or Service account without AccessCode.
Access Code
The authentication pop-up code.